Overview
Download Solution from here
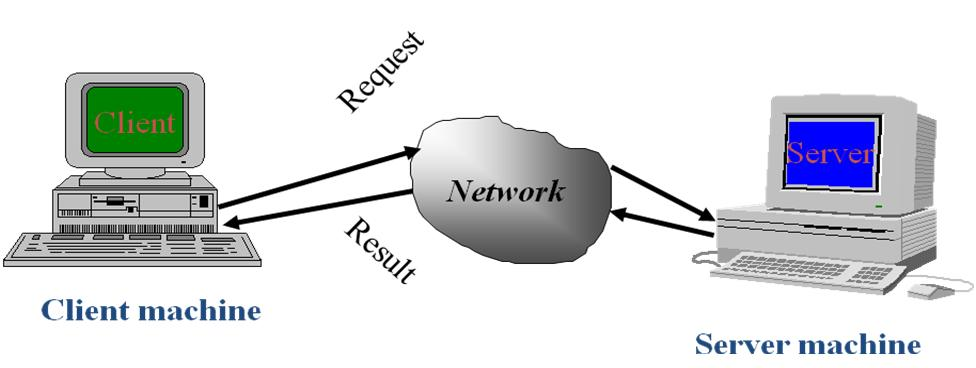
WCF Data Services (formerly ADO.NET Data Services,) is a platform for what Microsoft calls Data Services. It is actually a combination of the runtime and a web service through which the services are exposed. WCF Data Services exposes data, represented as Entity Data Model (EDM) objects, via web services accessed over HTTP. The data can be addressed using a REST-like URI. The data service, when accessed via the HTTP GET method with such a URI, will return the data. The web service can be configured to return the data in either plain XML, JSON or RDF+XML. In the initial release, formats like RSS and ATOM are not supported, though they may be in the future. In addition, using other HTTP methods like PUT, POST or DELETE, the data can be updated as well. POST can be used to create new entities, PUT for updating an entity, and DELETE for deleting an entity.
Create ASP.NET application to expose data as OData
I will be walking you through creating an ASP.NET application that utilizes a WCF (Windows Communication Foundation) data service, along with the WCF Data Services Entity Framework Provider to render the data as an OData endpoint.
In this article, I will be using Visual Studio 2015 Community version, which you can download for free by going to this link and clicking the Download button under Visual Studio Community.
You will create a sample data service that uses WCF Data Services to expose an Open Data Protocol (OData) feed that is based on the FaithDb sample database. The task involves the following basic steps:
-
Create an ASP.NET Web application.
-
Define the data model by using the Entity Data Model tools.
-
Add the data service to the Web application.
-
Enable access to the data service.
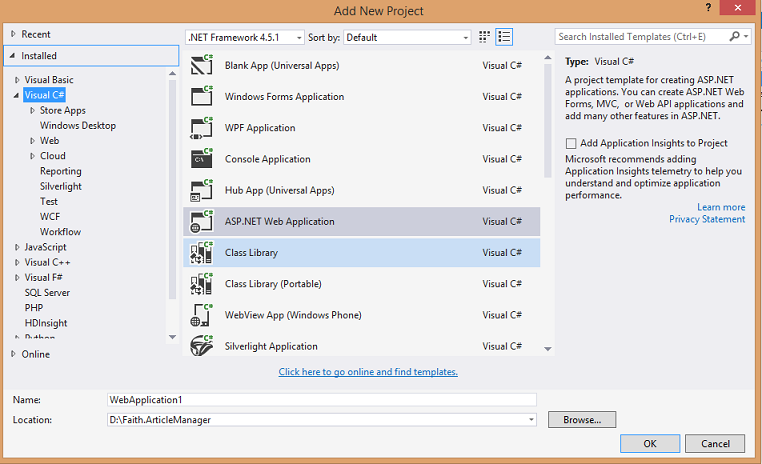
Create an ASP.NET Web application.
Once you have, open it up and create an ASP.NET Web Application using the Visual C# empty template. Name the project Faith.FaithDataService and save it somewhere on your local drive (see image below).
To define the data model
-
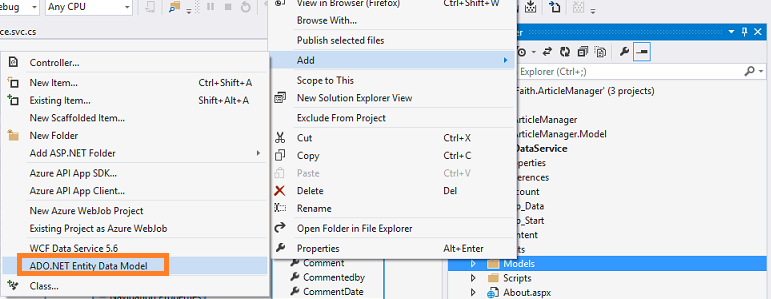
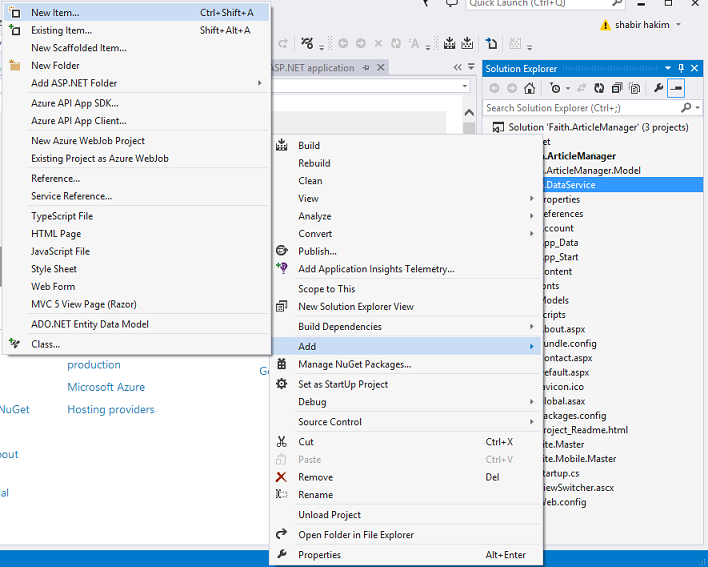
In Solution Explorer, right-click the name of the ASP.NET project, and then click Add New Item.
-
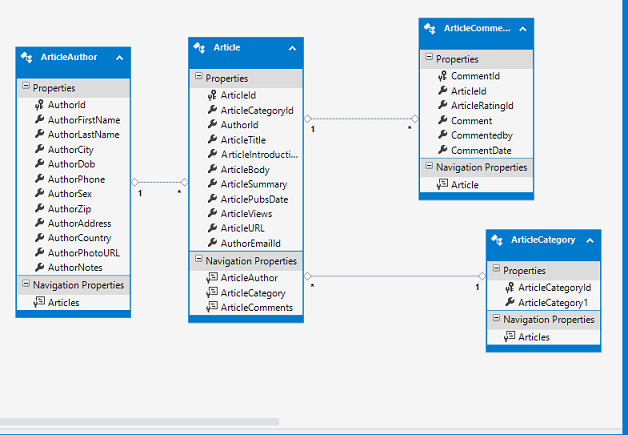
For the name of the data model, type ArticleModel.edmx.

-
In the Entity Data Model Wizard, select Generate from Database, and then click Next

-
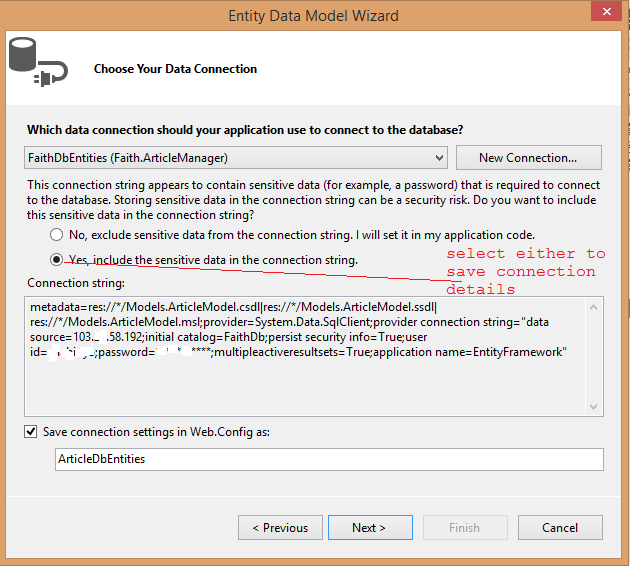
Connect the data model to the database by doing one of the following steps, and then click Next:
-
If you do not have a database connection already configured, click New Connection and create a new connection.
-
If you have a database connection already configured to connect to the FaithDbdatabase, select that connection from the list of connections.
-
-
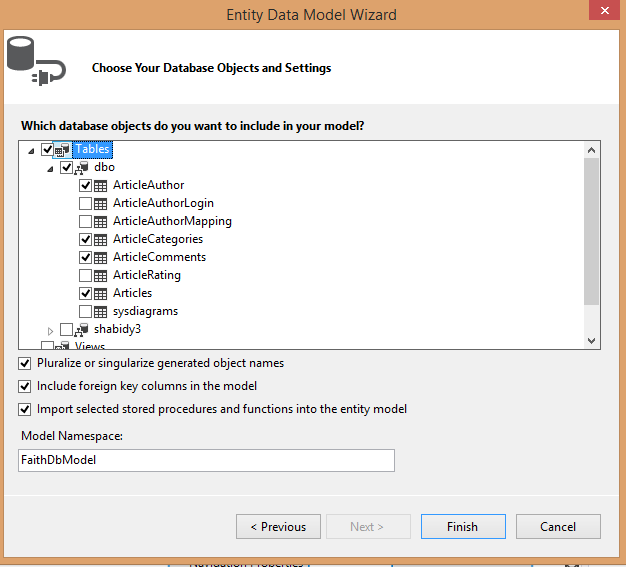
On the final page of the wizard, select the check boxes for all tables in the database, and clear the check boxes for views and stored procedures.
-
Click Finish to close the wizard.
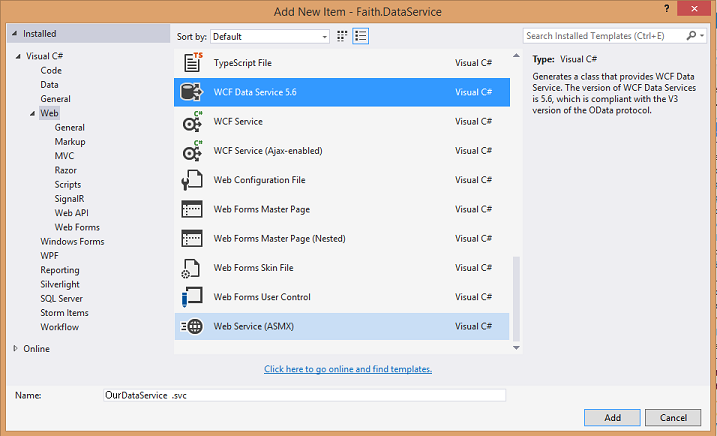
To create the data service
-
In Solution Explorer, right-click the name of your ASP.NET project, and then click Add New Item.
-
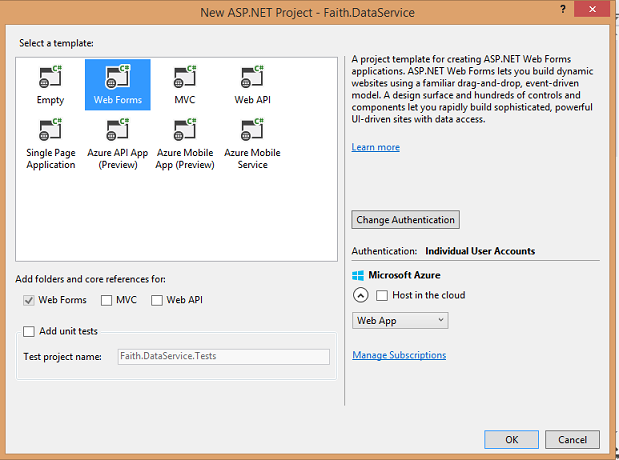
In the Add New Item dialog box, select WCF Data Service.For the name of the service, type OurDataService.By default, the code-editor window opens. In Solution Explorer, the service will have the name, OurDataService, with the extension .svc.cs or .svc.vb
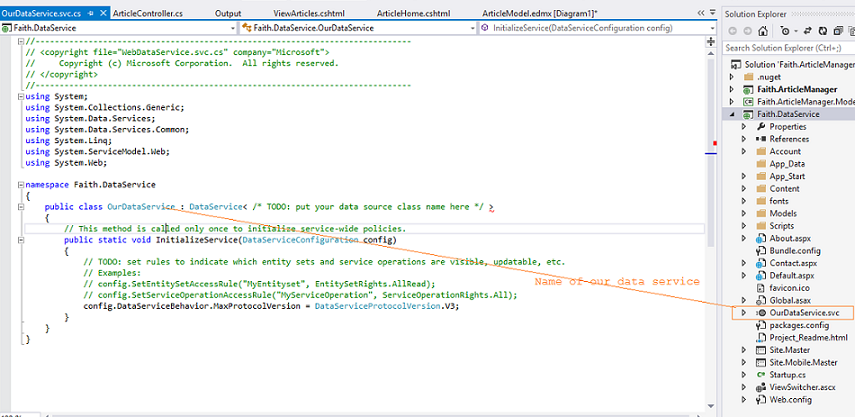
-
In the code for the data service, replace the comment /* TODO: put your data source class name here */ in the definition of the class that defines the data service with the type that is the entity container of the data model, which in this case is NorthwindEntities. The class definition should look this the following:
IMPORTANT POINT:Incase you are using entity framework 6 you need to install WCF Data service Entity Framework Provider like shown below
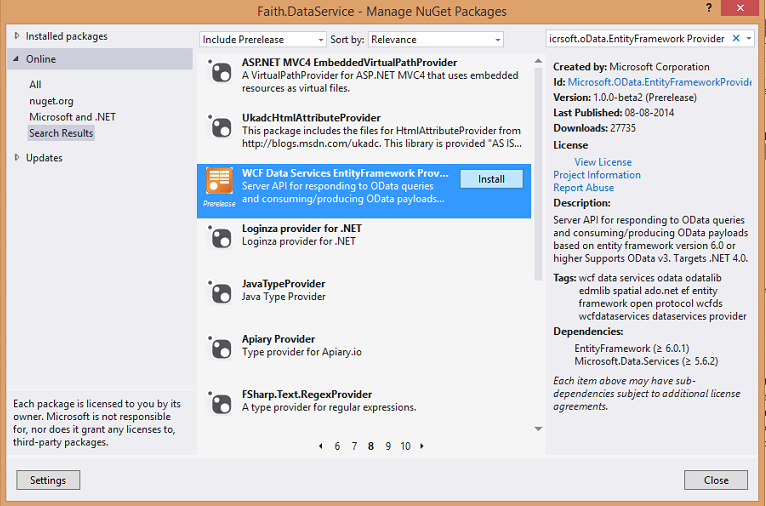
Replace the base type of your DataService. For EF 5 or below, your data service should inherit from DataService<T> where T is a DbContext or ObjectContext. For EF 6 or greater, your data service should inherit from EntityFrameworkDataService<T> where T is a DbContext like shown below

To enable access to data service resources
-
In the code for the data service, replace the placeholder code in the InitializeService function with the following:

This enables authorized clients to have read and write access to all resources .You can set it for the specified entity sets also.
Next & Final Steps
You have successfully created a new data service that exposes an OData feed that is based on the FaithDbsample database, and you have enabled access to the feed for clients that have permissions on the ASP.NET Web application. Next, you will start the data service from Visual Studio and you will access the OData feed by submitting HTTP GET requests through a Web browser:
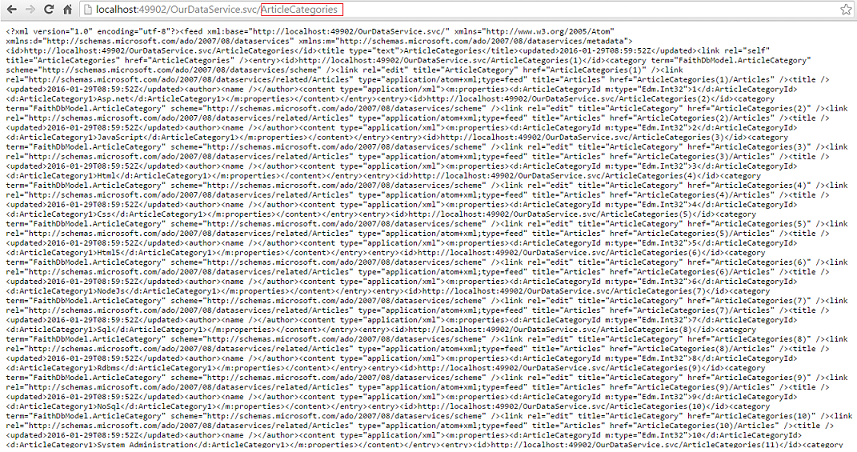
Run Asp.net Application and Set OurDataService.srv as startup Page or directly view ourservice.srv in browser The output will be shown like shown below
if you will observe It is showing list of tables from database or list of entities Model is made of.
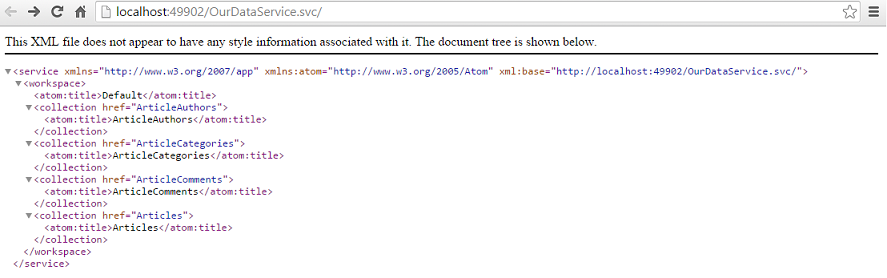
Same way you can check other entities like
1)http://localhost:49902/OurDataService.svc/Articles/
2)http://localhost:49902/OurDataService.svc/ArticlesAuthories/
Hope this Helps


Thanks for sharing a valuable information & love to hear from you soon!
ReplyDeleteEDMS solutions